Using PyCharm with Pyramid
This tutorial is a very brief overview of how to use PyCharm with Pyramid. PyCharm is an Integrated Development Environment (IDE) for Python programmers. It has numerous features including code completion, project management, version control system (git, Subversion, etc.), debugger, and more.
参考
See also Paul Everitt's video, Python 3 Web Development with Pyramid and PyCharm (about 1 hour in length).
This tutorial is a continually evolving document. Both PyCharm and Pyramid are under active development, and changes to either may necessitate changes to this document. In addition, there may be errors or omissions in this document, and corrections and improvements through a pull request are most welcome.
注釈
This guide was written for PyCharm 2.7.3, although many of the topics apply for current versions of PyCharm. There are now two editions for PyCharm: Professional Edition and a free Community Edition. PyCharm Professional Edition includes support for Pyramid, making installation and configuration of Pyramid much easier. Pyramid integration is not available in the free edition, so this tutorial will help you get started with Pyramid in that version.
There is also a free PyCharm Edu which is designed to help programmers learn Python programming and for educators to create lessons in Python programming.
To get started with Pyramid in PyCharm, we need to install prerequisite software.
Python
PyCharm and certain Python packages
Pyramid and its requirements
Install Python
You can download installers for Mac OS X and Windows, or source tarballs for Linux, Unix, or Mac OS X from python.org Download. Follow the instructions in the README files.
Install PyCharm
PyCharm is a commercial application that requires a license. Several license types are available depending on your usage.
Pyramid is an open source project, and on an annual basis fulfills the terms of the Free Open Source License with JetBrains for the use of PyCharm to develop for Pyramid and other projects under the Pylons Project. If you are a contributor to Pyramid or the Pylons Project, and would like to use our annual license, please contact the license maintainer stevepiercy in the #pyramid channel on irc.freenode.net.
Alternatively you can download a 30-day trial of PyCharm or purchase a license for development or training purposes under any other license.
Download PyCharm and follow the installation instructions on that web page.
Configure PyCharm
Create a New Project
Launch the PyCharm application.
From the Start Up screen, click Create New Project.
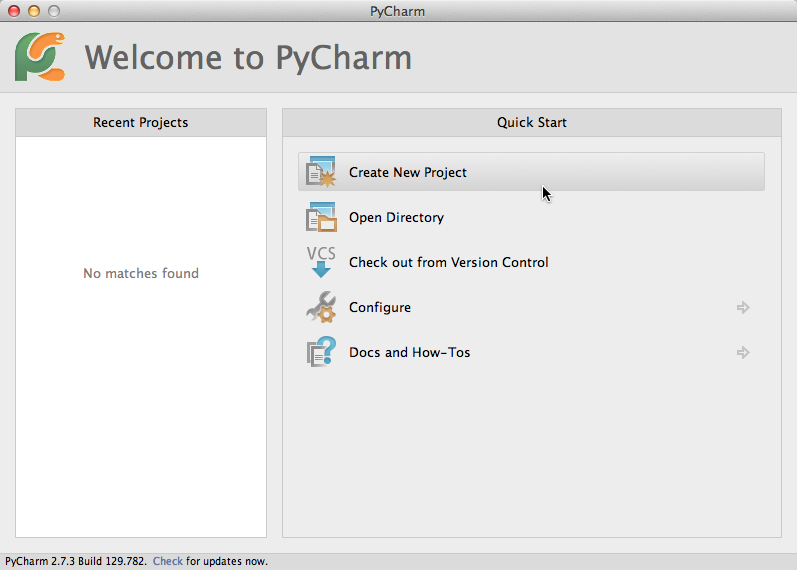
If the Start Up screen does not appear, you probably have an existing project open. Close the existing project and the Start Up screen will appear.

In the Create New Project dialog window do the following.
Enter a Project name. The Location should automatically populate as you type. You can change the path as you wish. It is common practice to use the path ~/projects/ to contain projects. This location shall be referred to as your "project directory" throughout the rest of this document.
Project type should be Empty project.
For Interpreter, click the ellipsis button to create a new virtual environment.
A new window appears, "Python Interpreters".
Create or Select a Python Interpreter
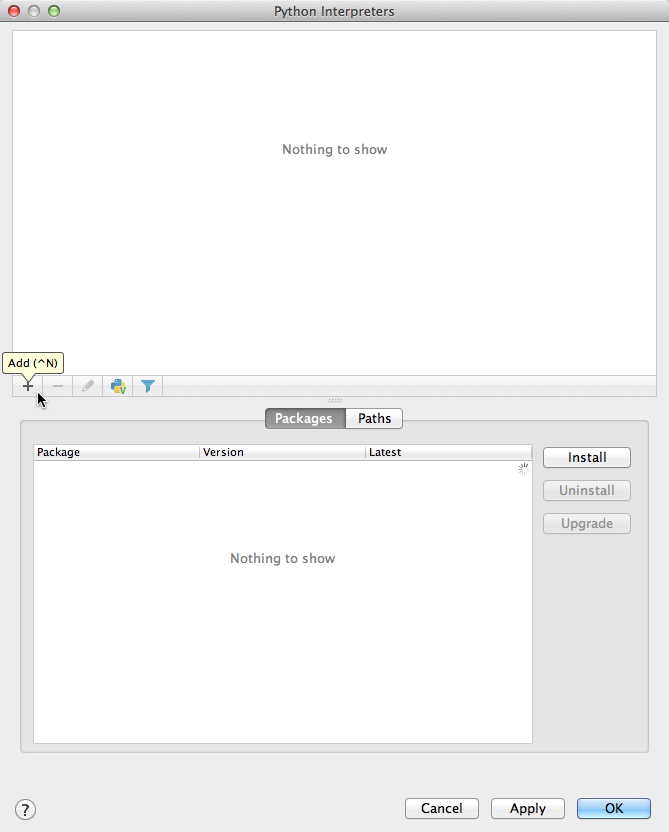
Either click the + button to add a new Python interpreter for Python 2.7 (the Python 2.7 installer uses the path /Library/Frameworks/Python.framework/Versions/2.7/bin), or use an existing Python interpreter for Python 2.7. PyCharm will take a few seconds to add a new interpreter.
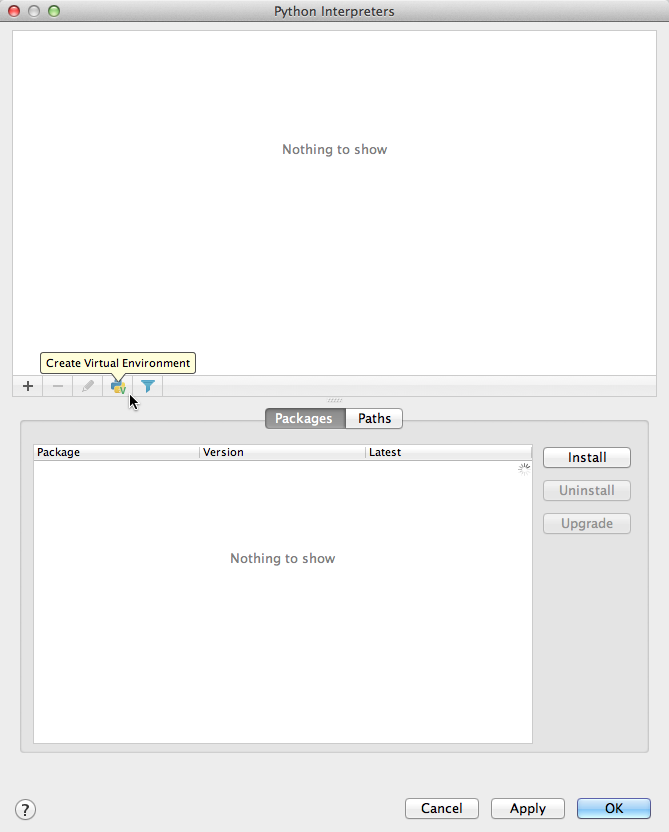
Create a Virtual Environment
Click the button with the Python logo and a green "V". A new window appears, "Create Virtual Environment".

Enter a Virtual Environment name.
The Location should automatically populate as you type. You can change the path as you wish.
The Base interpreter should be already selected, but if not, select /Library/Frameworks/Python.framework/Versions/2.7/bin or other Python 2.7 interpreter.
Leave the box unchecked for "Inherit global site packages".
Click "OK". PyCharm will set up libraries and packages, and return you to the Python Interpreters window.
Install setuptools and pyramid Packages
If you already have setuptools installed, you can skip this step.
In the Python Interpreters window with the just-created virtual environment selected in the top pane, in the lower pane select the Packages tab, and click the Install button. The Available Packages window appears.
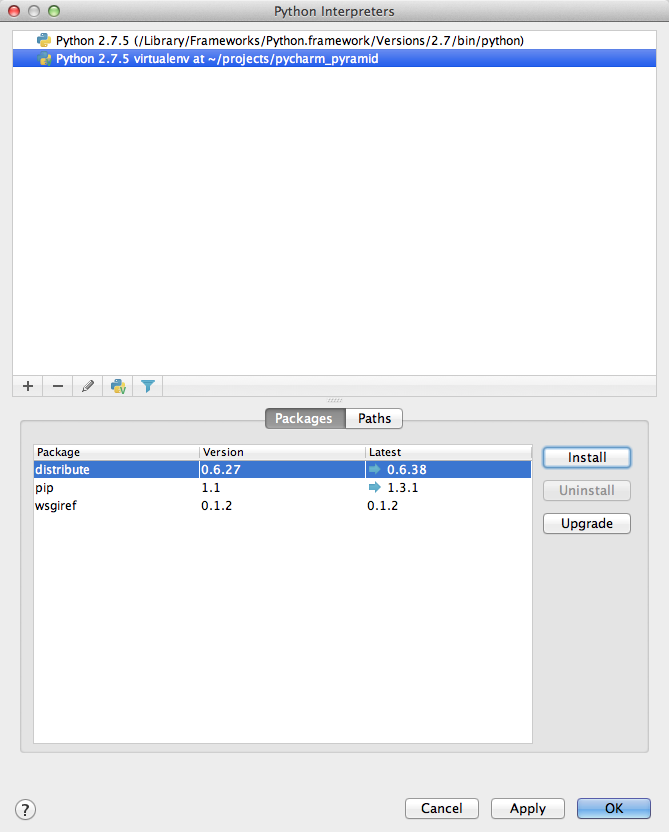
In the Available Packages window, in the search bar, enter "setuptools". Select the plain old "setuptools" package, and click the Install Package button and wait for the status message to disappear. PyCharm will install the package and any dependencies.
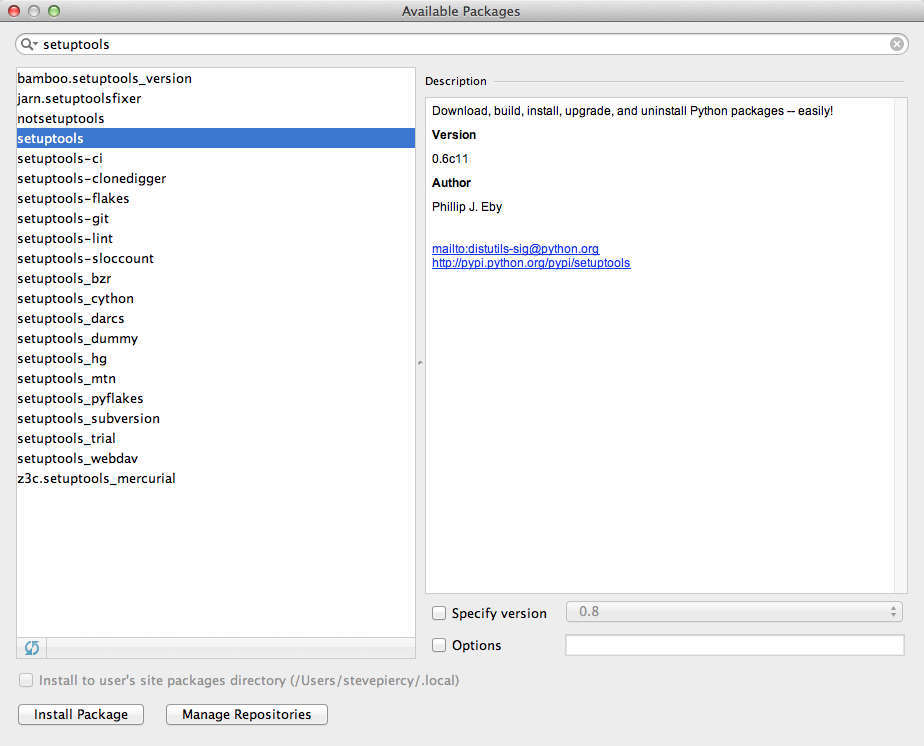
Repeat the previous step, except use "pyramid" for searching and selecting.
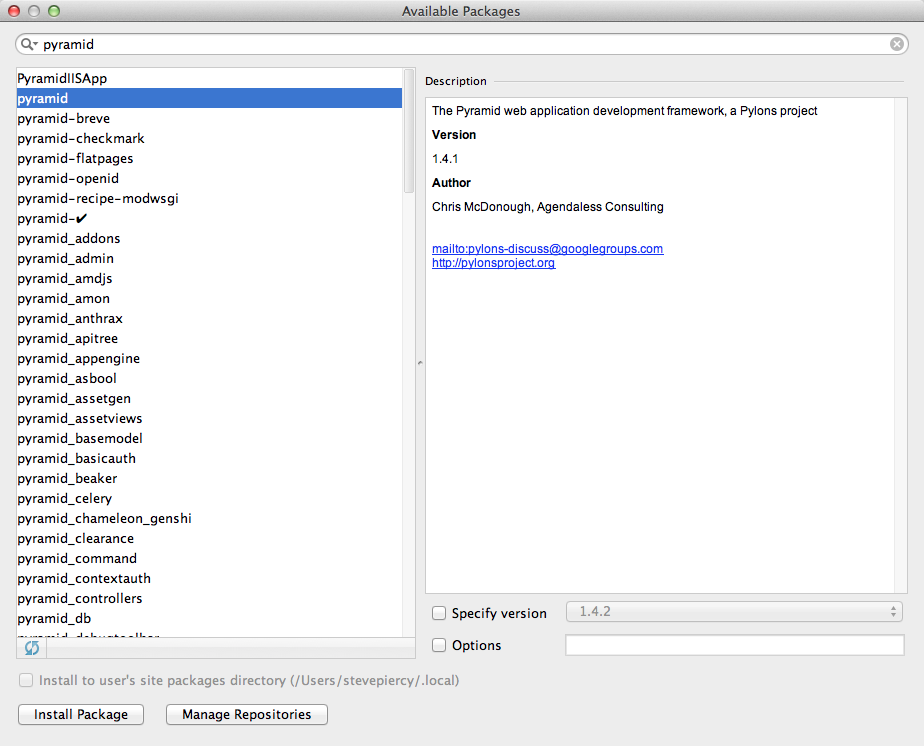
When PyCharm finishes installing the packages, close the Available Packages window.
In the Python Interpreters window, click the OK button.
In the Create New Project window, click the OK button.
If PyCharm displays a warning, click the Yes button. PyCharm opens the new project.
Clone the Pyramid repository
By cloning the Pyramid repository, you can contribute changes to the code or documentation. We recommend that you fork the Pyramid repository to your own GitHub account, then clone your forked repository, so that you can commit your changes to your GitHub repository and submit pull requests to the Pyramid project.
In PyCharm, select VCS > Enable Version Control Integration..., then select Git as your VCS and click the OK button.
See Cloning a Repository from GitHub in the PyCharm documentation for more information on using GitHub and git in PyCharm.
We will refer to the cloned repository of Pyramid on your computer as your "local Pyramid repository".
Install development and documentation requirements
In order to contribute bug fixes, features, and documentation changes to Pyramid, you must install development and documentation requirements into your virtual environment. Pyramid uses Sphinx and reStructuredText for documentation.
In PyCharm, select Run > Edit Configurations.... The Run/Debug Configurations window appears.
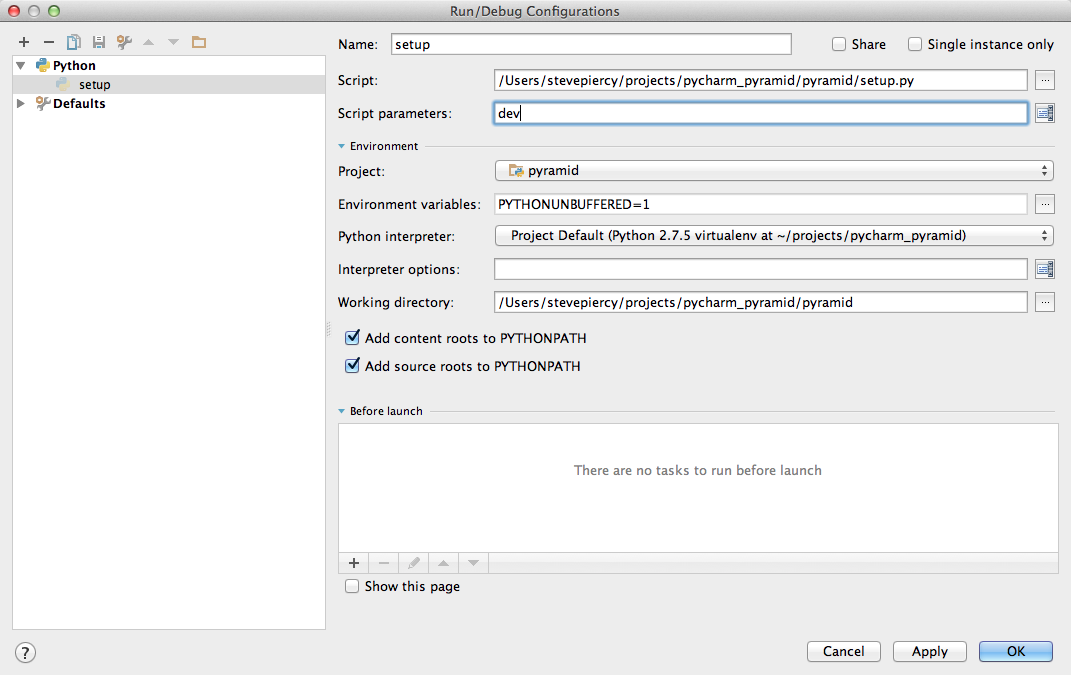
Click the "+" button, then select Python to add a new Python run configuration.
Name the configuration "setup dev".
Either manually enter the path to the setup.py script or click the ellipsis button to navigate to the pyramid/setup.py path and select it.
For Script parameters enter develop.
Click the "Apply" button to save the run configuration.
While we're here, let's duplicate this run configuration for installing the documentation requirements.
Click the "Copy Configuration" button. Its icon looks like two dog-eared pages, with a blue page on top of a grey page.
Name the configuration "setup docs".
Leave the path as is.
For Script parameters enter docs.
Click the "Apply" button to save the run configuration.
Click the "OK" button to return to the project window.
In the PyCharm toolbar, you will see a Python icon and your run configurations.

First select "setup dev", and click the "run" button (the green triangle). It may take some time to install the requirements. Second select "setup docs", and click the "run" button again.
To build docs, let's create a new run configuration.
In PyCharm, select Run > Edit Configurations....
Click the "+" button, then select Python docs > Sphinx Task to add a new docs build run configuration.
Select the command HTML.
The Project and Project interpreter should already be selected.
Enter appropriate values for the source, build, and current working directories.
You will now be ready to hack in and contribute to Pyramid.
Template languages
To configure the template languages Mako, Jinja 2, and Chameleon first see the PyCharm documentation Python Template Languages to select the template language for your project, then see Configuring Template Languages to both configure the template language and mark folders as Sources and Templates for your project.
Creating a Pyramid project
The information for this section is derived from Creating a Pyramid Project and adapted for use in PyCharm.
Creating a Pyramid project using scaffolds
Within PyCharm, you can start a project using a scaffold by doing the following.
Select Run > Edit Configurations....
Click the "+" button, then select Python to add a new Python run configuration.
Name the configuration "pcreate".
Either manually enter the path to the pcreate script or click the ellipsis button to navigate to the $VENV/bin/pcreate path and select it.
For Script parameters enter -s starter MyProject. "starter" is the name of one of the scaffolds included with Pyramid, but you can use any scaffold. "MyProject" is the name of your project.
Select the directory into which you want to place MyProject. A common practice is ~/projects/.
Click the OK button to save the run configuration.
Select Run > Run 'pcreate' to run the run configuration. Your project will be created.
Select File > Open directory, select the directory where you created your project MyProject, and click the Choose button. You will be prompted to open the project, and you may find it convenient to select "Open in current window", and check "Add to currently open projects".
Finally set the Project Interpreter to your virtual environment or verify it as such. Select PyCharm > Preferences... > Project Interpreter, and verify that the project is using the same virtual environment as the parent project.
If a yellow bar warns you to install requirements, then click link to do so.
Installing your newly created project for development
We will create another run configuration, just like before.
In PyCharm, select the setup.py script in the MyProject folder. This should populate some fields with the proper values.
Select Run > Edit Configurations....
Click the "+" button, then select Python to add a new Python run configuration.
Name the configuration "MyProject setup develop".
Either manually enter the path to the setup.py script in the MyProject folder or click the ellipsis button to navigate to the path and select it.
For Script parameters enter develop.
For Project, select "MyProject".
For Working directory, enter or select the path to MyProject.
Click the "Apply" button to save the run configuration.
Finally run the run configuration "MyProject setup develop". Your project will be installed.
Running the tests for your application
We will create yet another run configuration. [If you know of an easier method while in PyCharm, please submit a pull request.]
Select Run > Edit Configurations....
Select the previous run configuration "MyProject setup develop", and click the Copy Configuration button.
Name the configuration "MyProject setup test".
The path to the setup.py script in the MyProject folder should already be entered.
For Script parameters enter test -q.
For Project "MyProject" should be selected.
For Working directory, the path to MyProject should be selected.
Click the "Apply" button to save the run configuration.
Finally run the run configuration "MyProject setup test". Your project will run its unit tests.
Running the project application
When will creation of run configurations end? Not today!
Select Run > Edit Configurations....
Select the previous run configuration "MyProject setup develop", and click the Copy Configuration button.
Name the configuration "MyProject pserve".
Either manually enter the path to the pserve script or click the ellipsis button to navigate to the $VENV/bin/pserve path and select it.
For Script parameters enter development.ini.
For Project "MyProject" should be selected.
For Working directory, the path to MyProject should be selected.
Click the "Apply" button to save the run configuration.
Finally run the run configuration "MyProject pserve". Your project will run. Click the link in the Python console or visit the URL http://0.0.0.0:6543/ in a web browser.
You can also reload any changes to your project's .py or .ini files automatically by using the Script parameters development.ini --reload.
Debugging
See the PyCharm documentation Working with Run/Debug Configurations for details on how to debug your Pyramid app in PyCharm.
First, you cannot simultaneously run and debug your app. Terminate your app if it is running before you debug it.
To debug your app, open a file in your app that you want to debug and click on the gutter (the space between line numbers and the code) to set a breakpoint. Then select "MyProject pserve" in the PyCharm toolbar, then click the debug icon (which looks like a green ladybug). Your app will run up to the first breakpoint.
