非正規化核の畳み込み
いくつかのタスク(ソースコードを探すなど)は,カーネルが標準化されていないフィルタを適用する必要がある.
この動作は、行動の良いデータ(欠落または無限大の値を含まない)については、この動作を1ステップで行うことができる:
convolve(image, kernel)
実例.
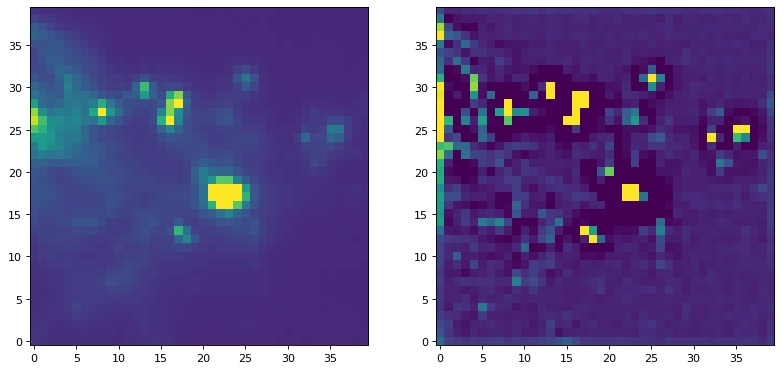
標準化されていないカーネルアプリケーションフィルタを使用する例では、一般的なピーク拡張カーネルを実行することを試みることができる:
import numpy as np
import matplotlib.pyplot as plt

from astropy.io import fits
from astropy.utils.data import get_pkg_data_filename
from astropy.convolution import CustomKernel
from scipy.signal import convolve as scipy_convolve
from astropy.convolution import convolve, convolve_fft


# Load the data from data.astropy.org
filename = get_pkg_data_filename('galactic_center/gc_msx_e.fits')
hdu = fits.open(filename)[0]

# Scale the file to have reasonable numbers
# (this is mostly so that colorbars don't have too many digits)
# Also, we crop it so you can see individual pixels
img = hdu.data[50:90, 60:100] * 1e5

kernel = CustomKernel([[-1,-1,-1], [-1, 8, -1], [-1,-1,-1]])

astropy_conv = convolve(img, kernel, normalize_kernel=False, nan_treatment='fill')
#astropy_conv_fft = convolve_fft(img, kernel, normalize_kernel=False, nan_treatment='fill')

plt.figure(1, figsize=(12, 12)).clf()
ax1 = plt.subplot(1, 2, 1)
im = ax1.imshow(img, vmin=-6., vmax=5.e1, origin='lower',
                interpolation='nearest', cmap='viridis')

ax2 = plt.subplot(1, 2, 2)
im = ax2.imshow(astropy_conv, vmin=-6., vmax=5.e1, origin='lower',
                interpolation='nearest', cmap='viridis')
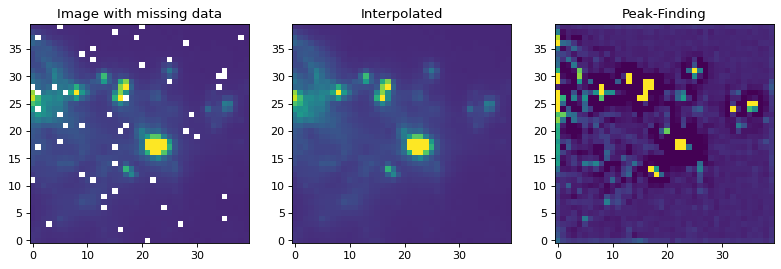
画像が値(NAN)を欠いている場合、まずそれらを実数値で置き換える必要があります。一般に、この動作を実行する最適な方法は、NaN値を補間値に置き換えることである。以下の例では、不良データを置換するために、私たちのピークコアと類似したサイズのガウスコアを使用し、その後、ピークコアを探すために適用される。
from astropy.convolution import Gaussian2DKernel, interpolate_replace_nans

# Select a random set of pixels that were affected by some sort of artifact
# and replaced with NaNs (e.g., cosmic-ray-affected pixels)
np.random.seed(42)
yinds, xinds = np.indices(img.shape)
img[np.random.choice(yinds.flat, 50), np.random.choice(xinds.flat, 50)] = np.nan

# We smooth with a Gaussian kernel with x_stddev=1 (and y_stddev=1)
# It is a 9x9 array
kernel = Gaussian2DKernel(x_stddev=1)

# interpolate away the NaNs
reconstructed_image = interpolate_replace_nans(img, kernel)


# apply peak-finding
kernel = CustomKernel([[-1,-1,-1], [-1, 8, -1], [-1,-1,-1]])

# Use the peak-finding kernel
# We have to turn off kernel normalization and set nan_treatment to "fill"
# here because `nan_treatment='interpolate'` is incompatible with non-
# normalized kernels
peaked_image = convolve(reconstructed_image, kernel,
                        normalize_kernel=False,
                        nan_treatment='fill')

plt.figure(1, figsize=(12, 12)).clf()
ax1 = plt.subplot(1, 3, 1)
ax1.set_title("Image with missing data")
im = ax1.imshow(img, vmin=-6., vmax=5.e1, origin='lower',
                interpolation='nearest', cmap='viridis')

ax2 = plt.subplot(1, 3, 2)
ax2.set_title("Interpolated")
im = ax2.imshow(reconstructed_image, vmin=-6., vmax=5.e1, origin='lower',
                interpolation='nearest', cmap='viridis')

ax3 = plt.subplot(1, 3, 3)
ax3.set_title("Peak-Finding")
im = ax3.imshow(peaked_image, vmin=-6., vmax=5.e1, origin='lower',
                interpolation='nearest', cmap='viridis')